
- July 21, 2015
- Posted by: Surender Kumar
- Category: Android
Root Sony Xperia Z
Table of Contents
If using Android Lollipop 5.0.2 (Firmware: 10.6.A.0.454)
Recently, We got Android lollipop 5.0.2 for Sony Xperia Z. After updating to latest firmware version, everyone want to Root their device but it is always difficult to Root latest Firmware available because the manufacturer tends to fix all the exploits used to Root the device.
If you are looking to Root your Xperia Z, this can help you.
This guide will work with the devices having Locked and Unlocked Bootloader.
Prerequisites
1. Upgrade to Lollipop 5.0.2.
2. Install drivers and configure ADB on your PC.
3. Enable USB debugging on your phone and Allow installation of apps from unknown sources under security settings.
Read the instructions carefully before proceeding.
Steps:-
1. Download the data.zip file from here.
2. Extract the contents into your working ADB directory (where adb.exe is located).
3. Connect your phone to PC via USB cable.
3. Copy KingRoot-4.1.0.249.apk file to your phone. Install the apk and run it. Make sure you are connected to internet as the KingRoot tool uses internet connection to download suitable exploit for your device on the go. After you run it, click Try Root option and let it complete till 100%. It will confirm that Rooting is successful. Now your phone is rooted.
If you do not like KingRoot and KingUser (for any reason) and want to switch to SuperSU then follow these steps:
1. Make sure you have extracted all the apps from data.zip into ADB directory. Browse to your ADB directory, press & hold Shift Key on Keyboard then right click on empty space to open context menu and select Open command window here. In command windows, type “adb devices” without quotes. You should be able to see your device listed. Then type the following commands carefully in same order (copy paste is better way to prevent any typo:
adb push su /data/local/tmp
adb push busybox /data/local/tmp
adb shell
2. You will be taken to a shell prompt with $ sign. In the shell type the following commands and keep your eye on your phone, when prompted, give the access permission:
su
mount -o remount,rw /system
cat /data/local/tmp/su >/system/xbin/daemonsu && chmod 0755 /system/xbin/daemonsu
cat /data/local/tmp/busybox >/system/xbin/busybox && chmod 0755 /system/xbin/busybox
daemonsu -d &
Leave the command Window running and do not disconnect your phone while you continue with the rest of steps.
3. Open the KingUser app in your phone, open settings (at the top right corner) and click Root authorization setting and then Remove Root permission. The app will be uninstalled automatically.
4. Uninstall the other two remaining KingRoot apps from your phone (KingRoot and the other one with Chinese language and the blue icon).
5. Go back to the Command window running adb, and type the following commands:
cat /data/local/tmp/su > /system/xbin/su && chmod 0755 /system/xbin/su
busybox chattr -ia /system/xbin/ku.sud
busybox chattr -ia /system/xbin/supolicy
busybox chattr -ia /system/xbin/pidof
rm /system/xbin/ku.sud
rm /system/xbin/supolicy
rm /system/xbin/pidof

rm /system/bin/debuggerd
rm /system/bin/debuggerd_real
rm /system/bin/debuggerd64

busybox chattr -ia /system/bin/install-recovery.sh
busybox chattr -ia /system/bin/rt.sh
rm /system/bin/install-recovery.sh
rm /system/bin/rt.sh

busybox chattr -ia /system/bin/.usr/.ku
rm -rf /system/bin/.usr

rm /system/usr/icu/icusuflag.conf
busybox chattr -ia /system/usr/iku/isu
rm -rf /system/usr/iku

rm /system/kroot_*
rm /sdcard/kr-stock-conf
rm -rf /sdcard/Kingroot
Again leave this command window running and do not disconnect your phone.
6. Copy Superuser.apk file (from extracted data.zip folder) into phone’s sdcard.
7. Go to your phone and Install Superuser.apk, Run it and let it update the SU binary.
8. Reboot your phone and enjoy the ROOT access on your latest Android 5.0.2 Lollipop.
If using Android Kitkat 4.4.4 (10.5.1.A.0.292)
To Root Xperia Z running android KitKat, follow the instructions below. You do not need to have unlocked Bootloader to complete this procedure.
- Install FlashTool and ADB drivers as shown here
- Enable USB debugging in you Xperia Z
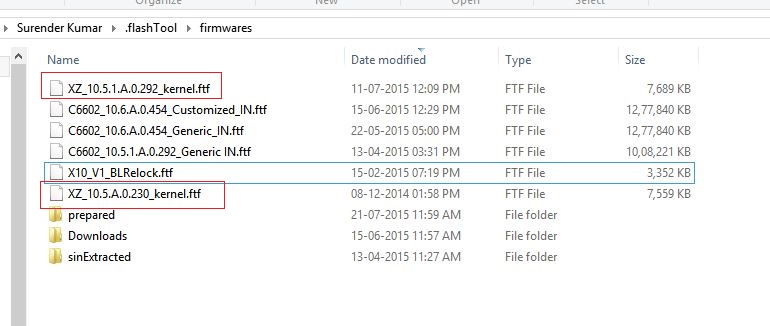
- Download XZ_10.5.A.0.230_kernel.ftf and XZ_10.5.1.A.0.292_kernel.ftf
- Put both ftf files into firmwares directory. The default installation directory is “C:\users\%username%\.flashtool\firmwares”
- Launch FlashTool and flash XZ_10.5.A.0.230_kernel.ftf file using instructions here. We have flashed this version because this kernel version supports Rooting. Sony has fixed various ROOT exploits in newer versions. (Don’t worry, we will restore it to new version later)
- Start your phone, enable USB debugging and then connect it to PC. Note:- wifi will not work at this stage but don’t panic, this will be corrected later.
- Now, select Root device option in FlashTool. You will see something running on your phone as shown below
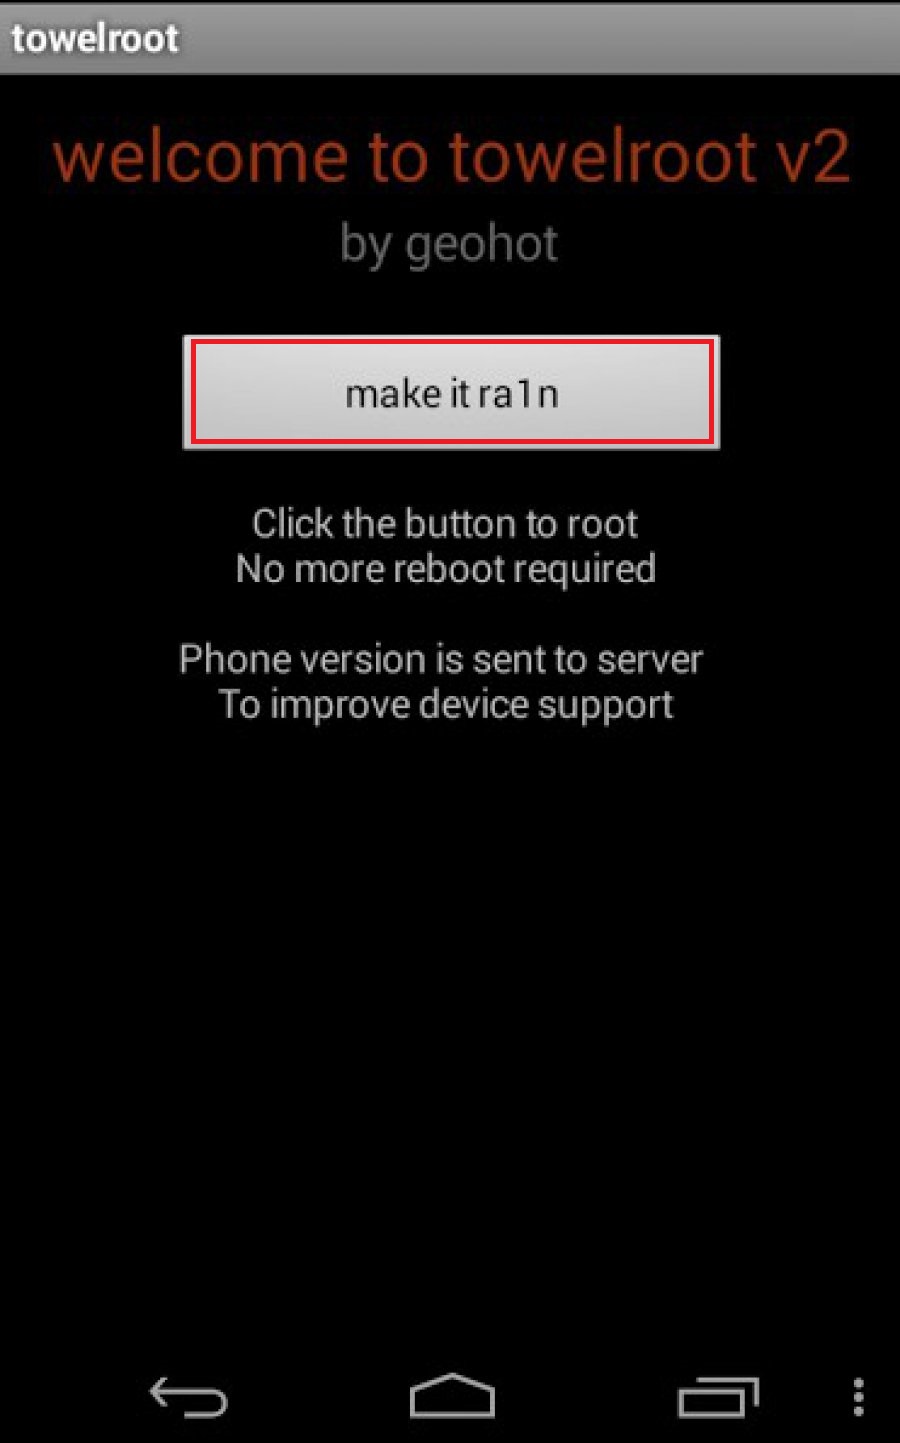
 Click on make it ra1n box and your phone will reboot automatically.
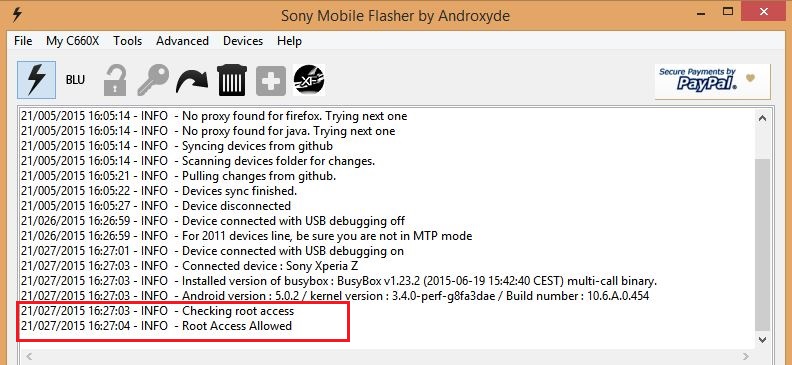
 - When phone is rebooted update the SuperSU binary if asked. Check if the phone is rooted by installing Root checker. You can also check by connecting the phone to PC and selecting Ask for Root permission option (Key icon) in FlashTool.
 If Root method of FlashTool does not work for you, you can try Easy Root Tool.
 - Shutdown your device once it is Rooted.
- Now flash the XZ_10.5.1.A.0.292_kernel.ftf file using FlashTool.
- Disconnect and power on your phone.
- You may need to install or update SuperSU from the Google Play. It is a Root permission manager which allows you to control which app and process should be allowed Root access.
Now you can enjoy the Root access and install your favorite Apps which require Root access.